Easy creation of a menu group and its content
To create a simple menu group without many further options and fill it, continue in the corresponding article "Essentials for the start" or click the following link to be forwarded directly to the article.
https://help.simplyorder.ch/en/articles/1-essential-settings-to-start
Adding items to a menu group (Advanced)
How to add drinks and meals to your menus and edit them with all the advanced options.
You can add content to your menus at simplyorder.ch/dashboard/settings/menu.
To do this, click on the "Add item" button.
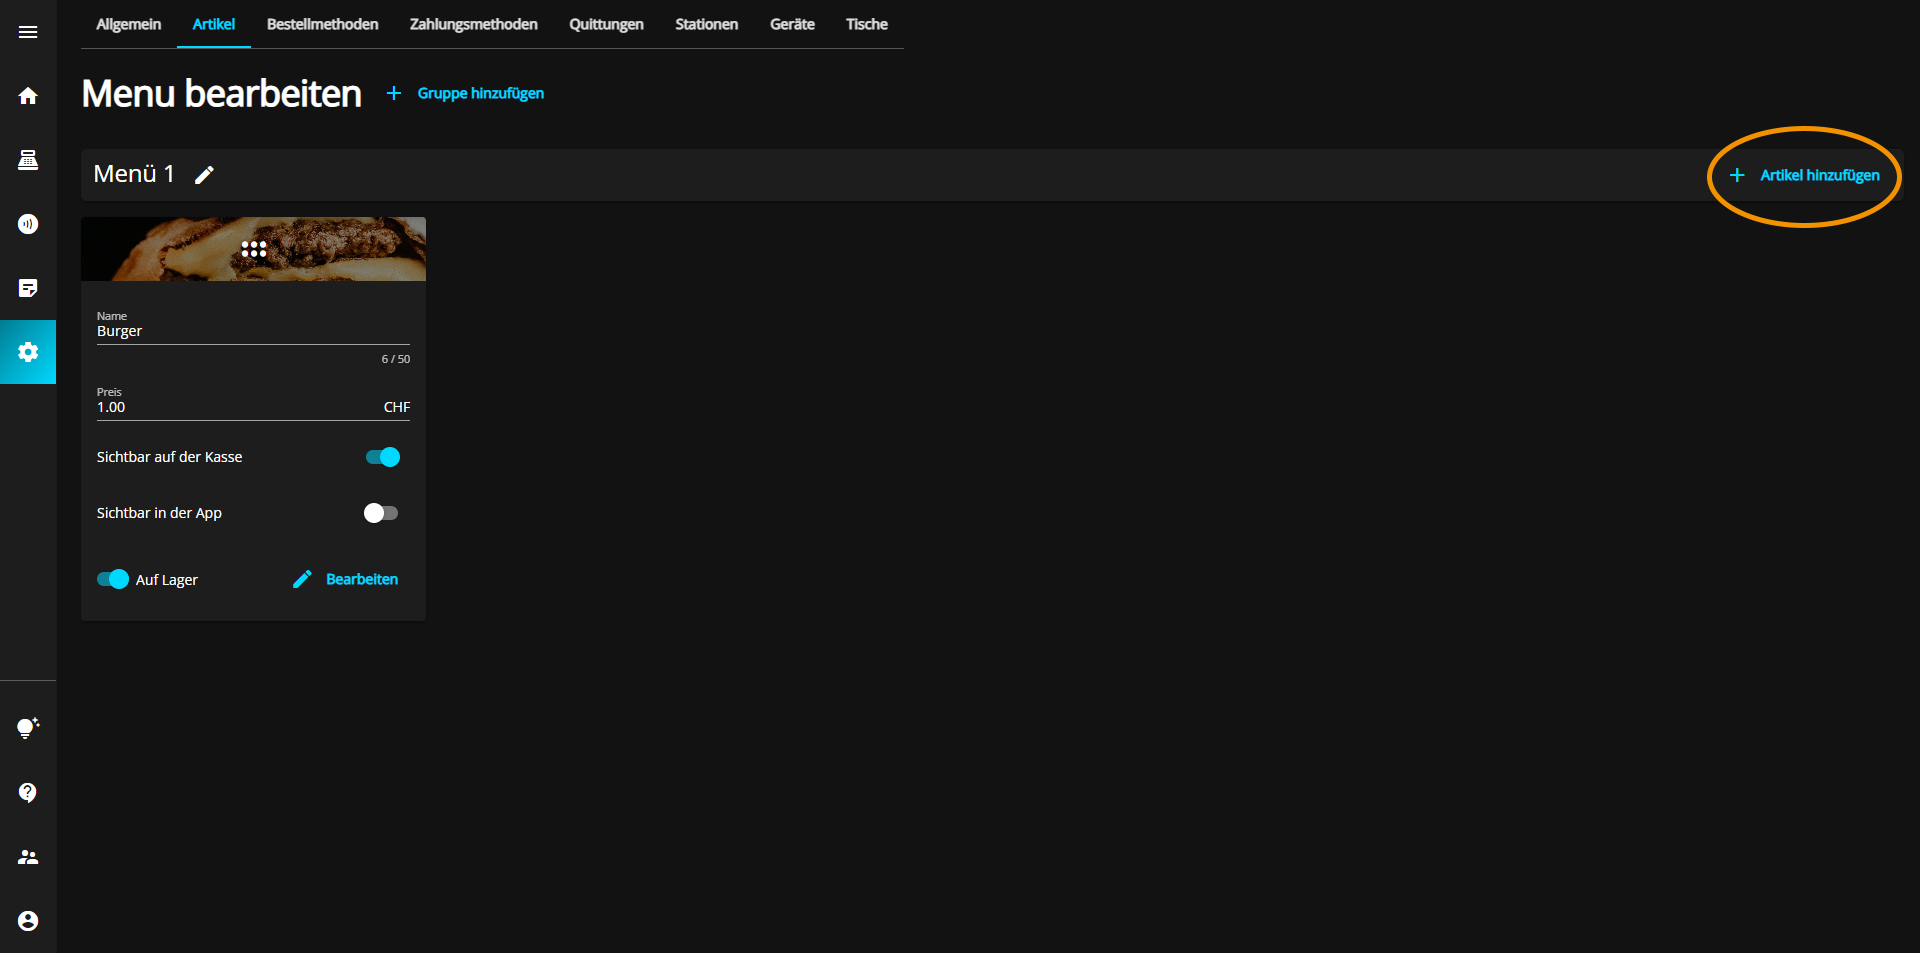
A new product appears directly below the selected menu group.
Click on the "Edit" button at the bottom right of the new panel to edit your menu.
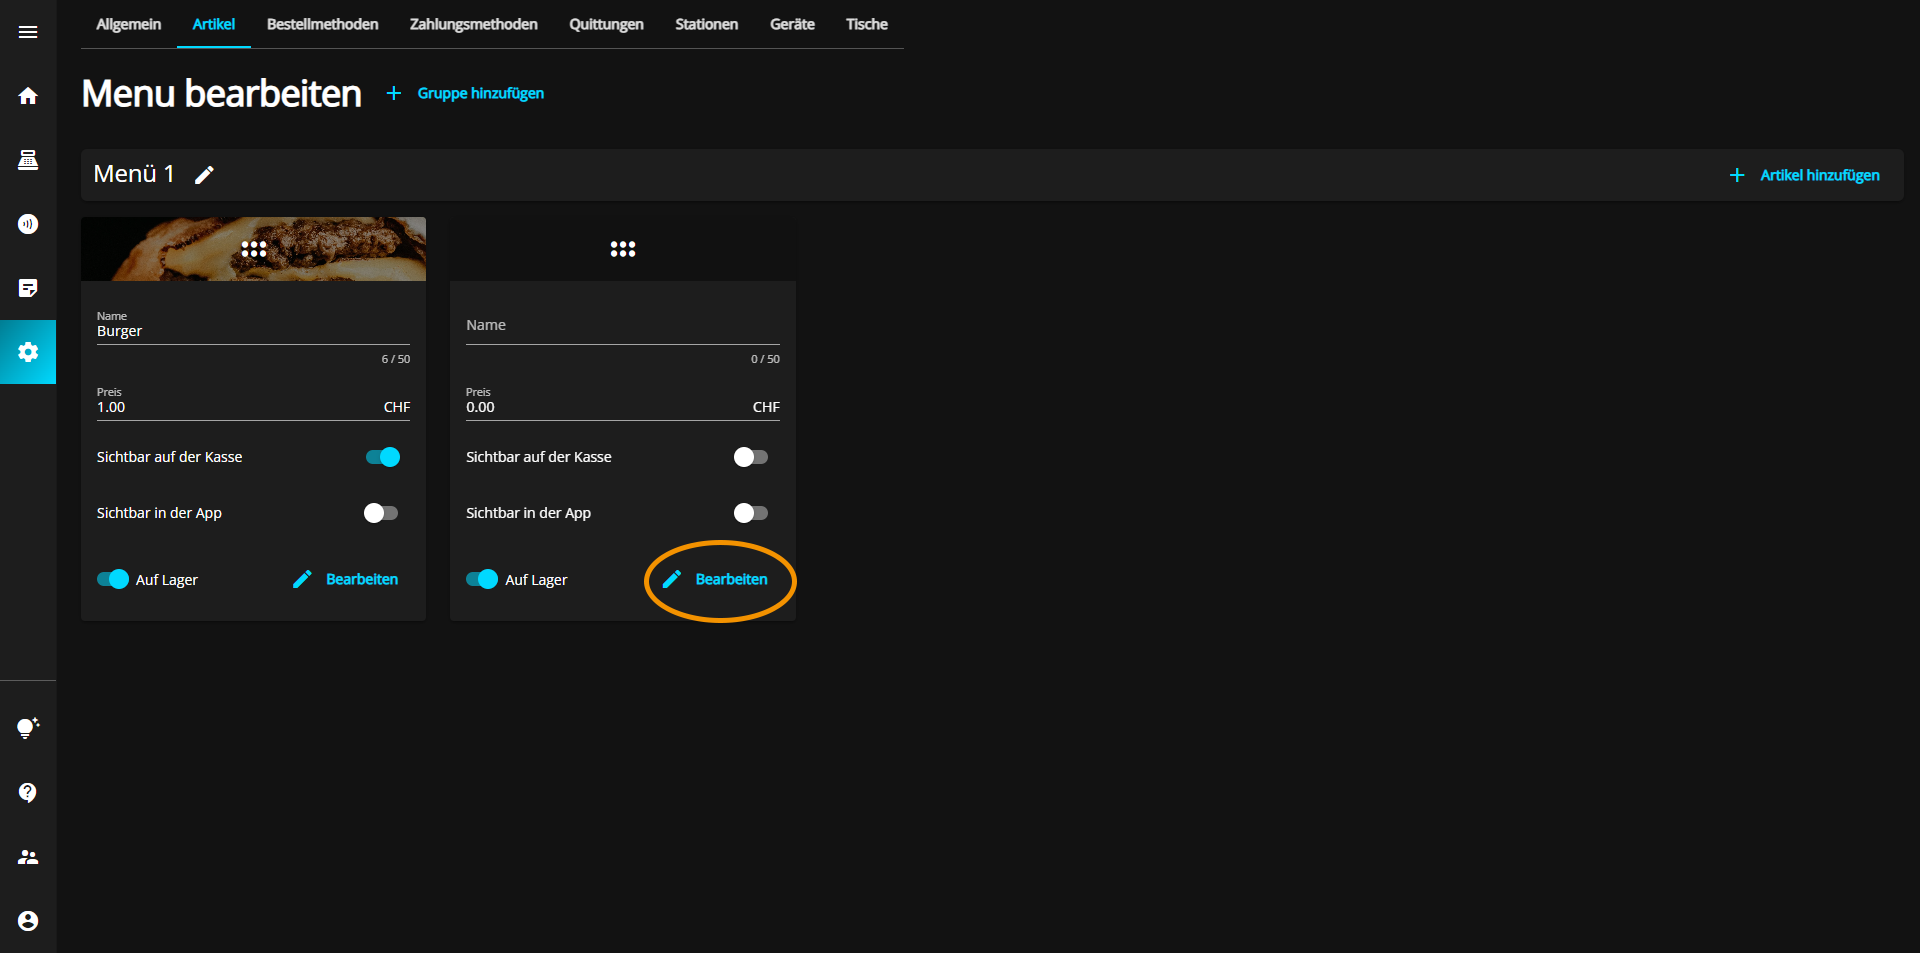
A new window will open in which you can see the advanced options.
You can now add an image to your product.
To do this, click on the "Select image" field at the top right, directly under "Delete article".

Select the desired image to upload it.
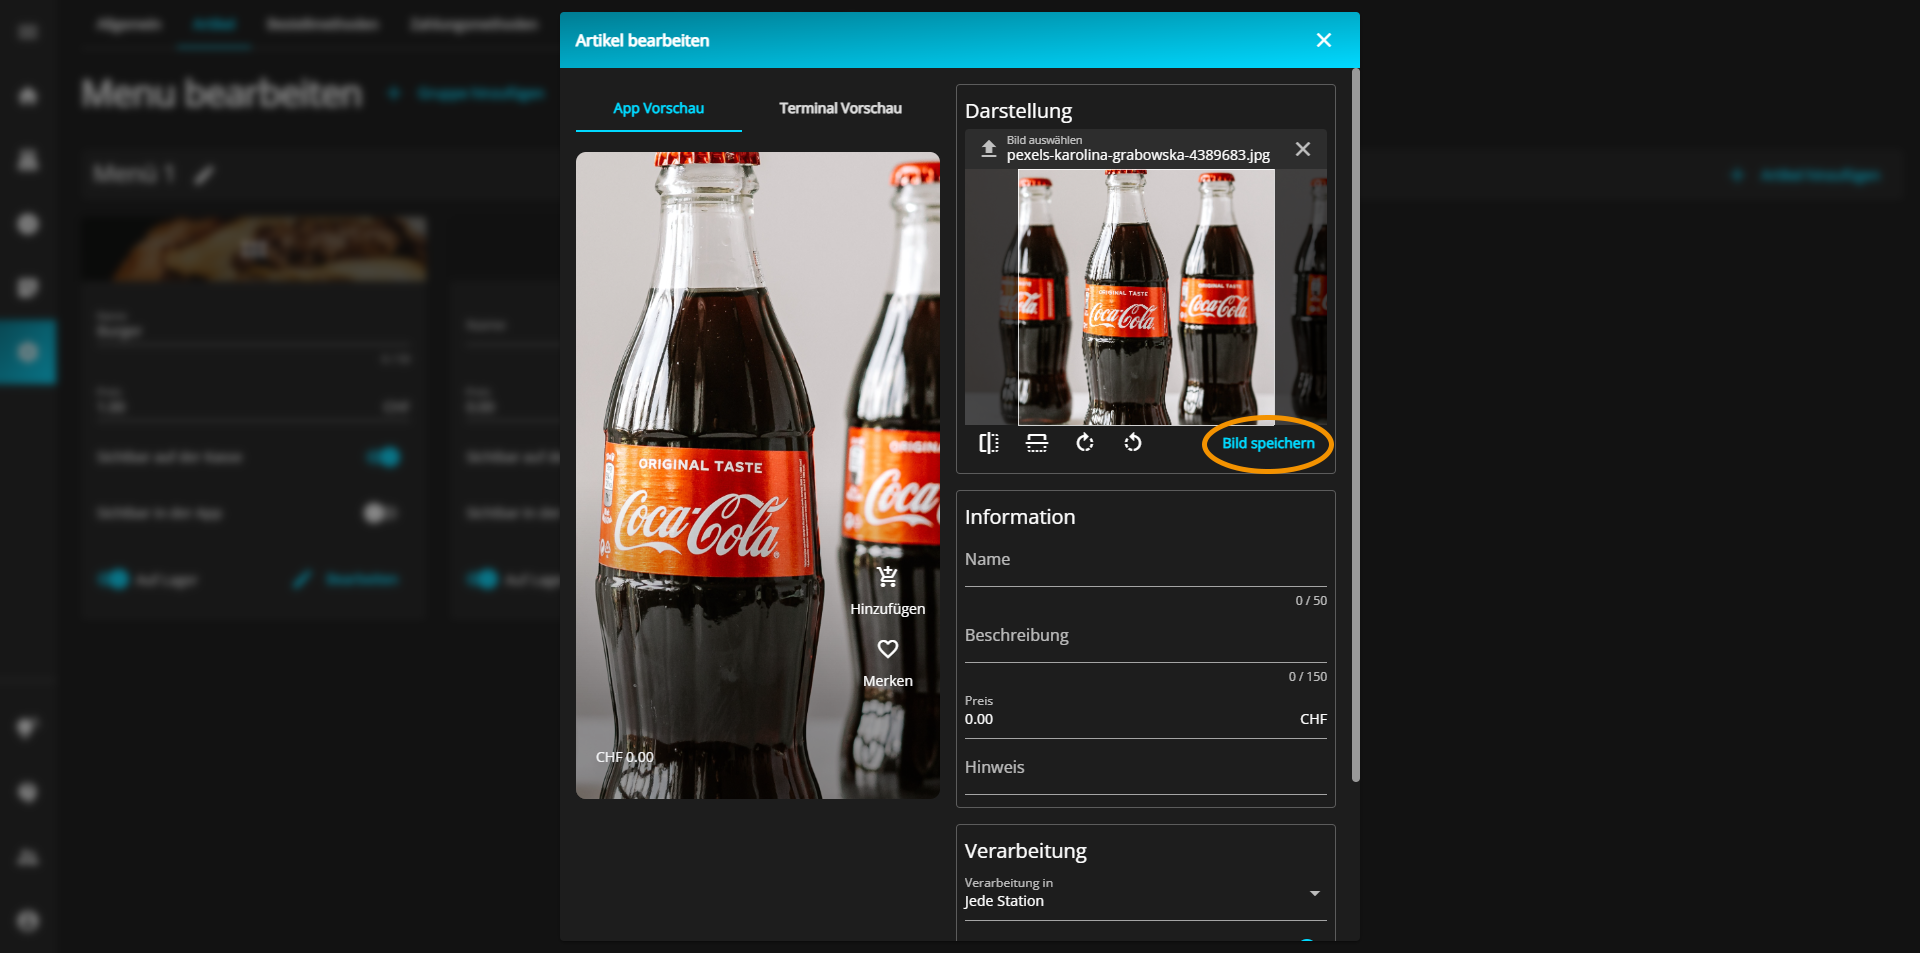
You can now move the image. You can also flip the whole thing vertically or horizontally by clicking on the respective buttons.

You can also rotate the image to the left or right by pressing one of the following buttons.
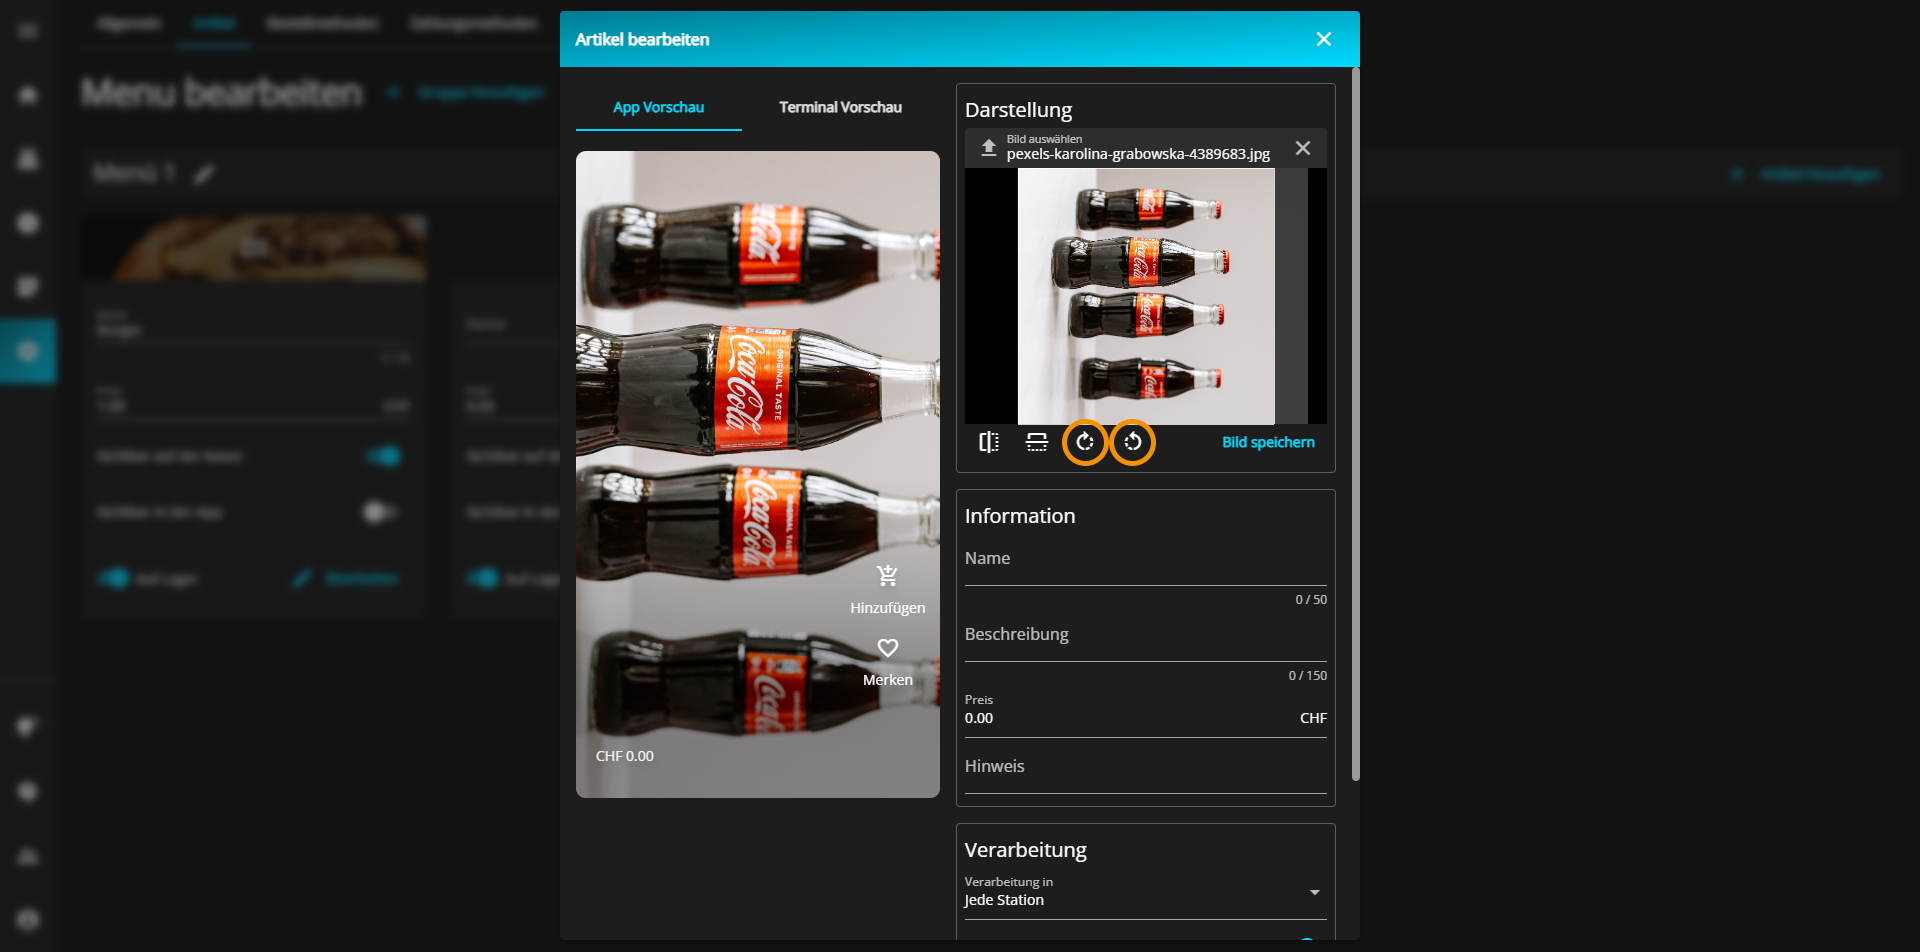
Last but not least, you can zoom in on the image by turning the mouse wheel forwards.
After you have adjusted everything to your preferences, click on the "Save image" button to save your image.
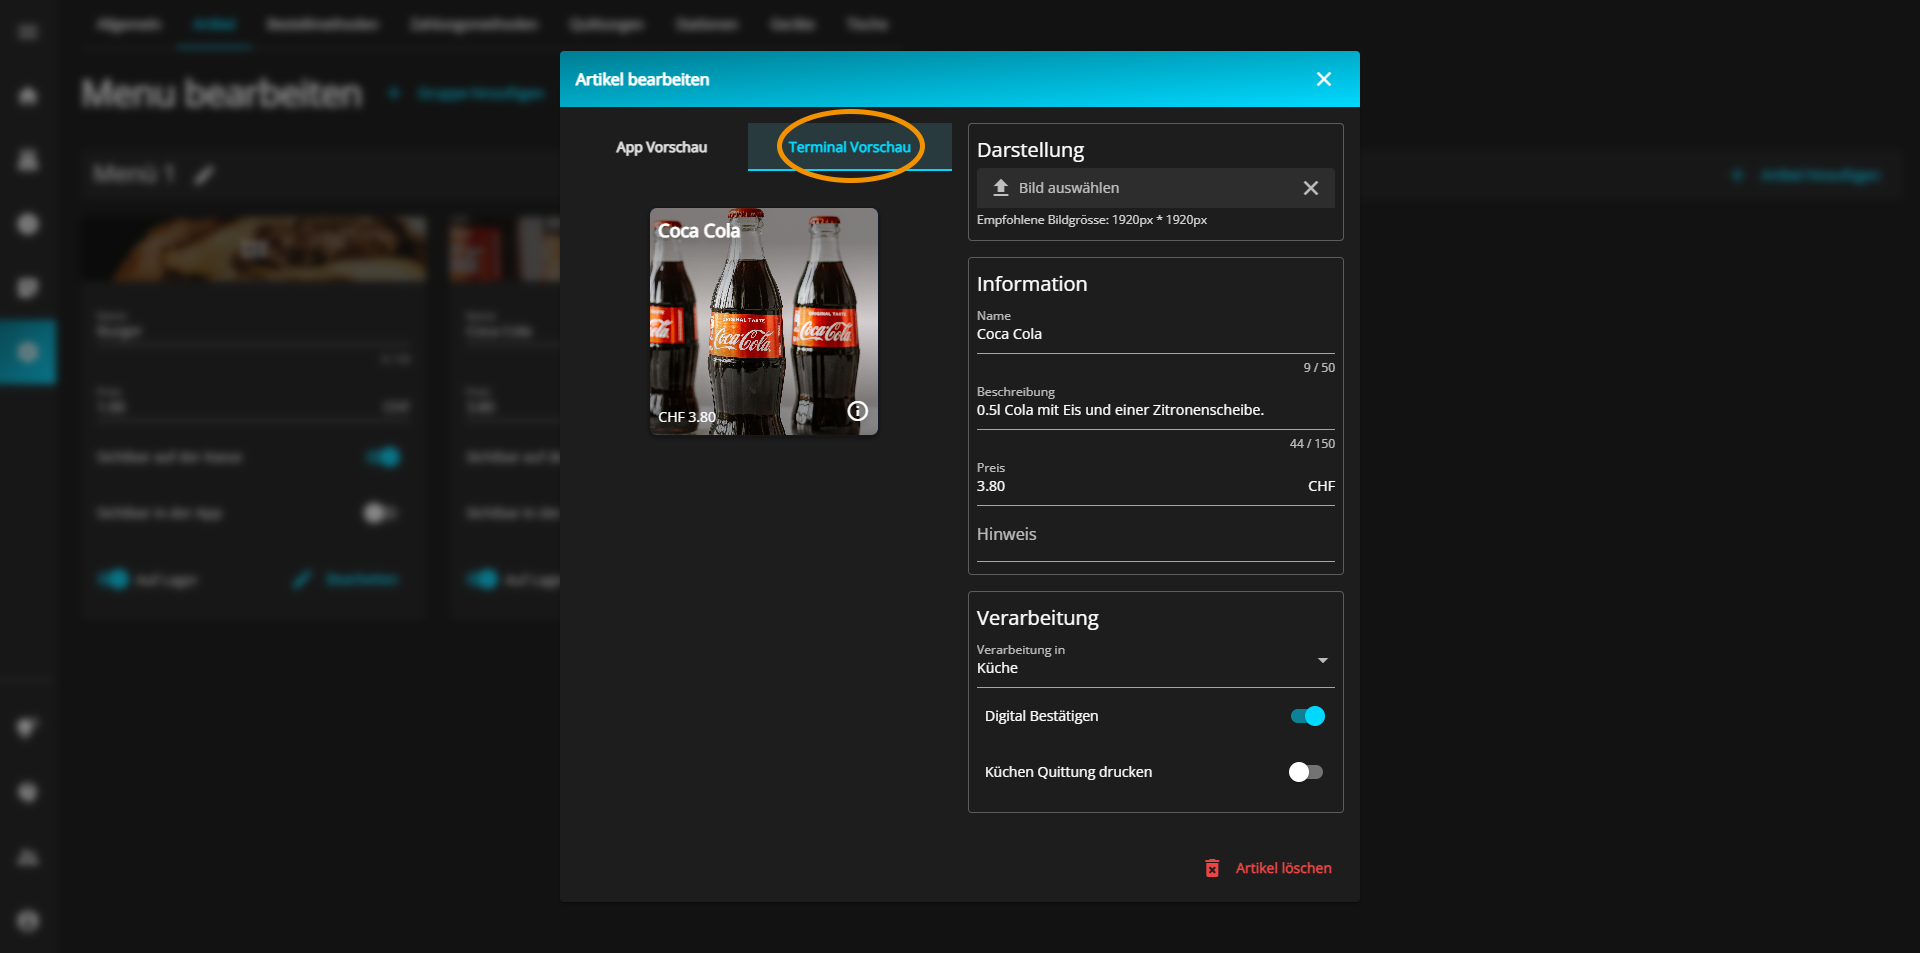
To change the name of your product, click in the "Name" text field and enter the desired product name.
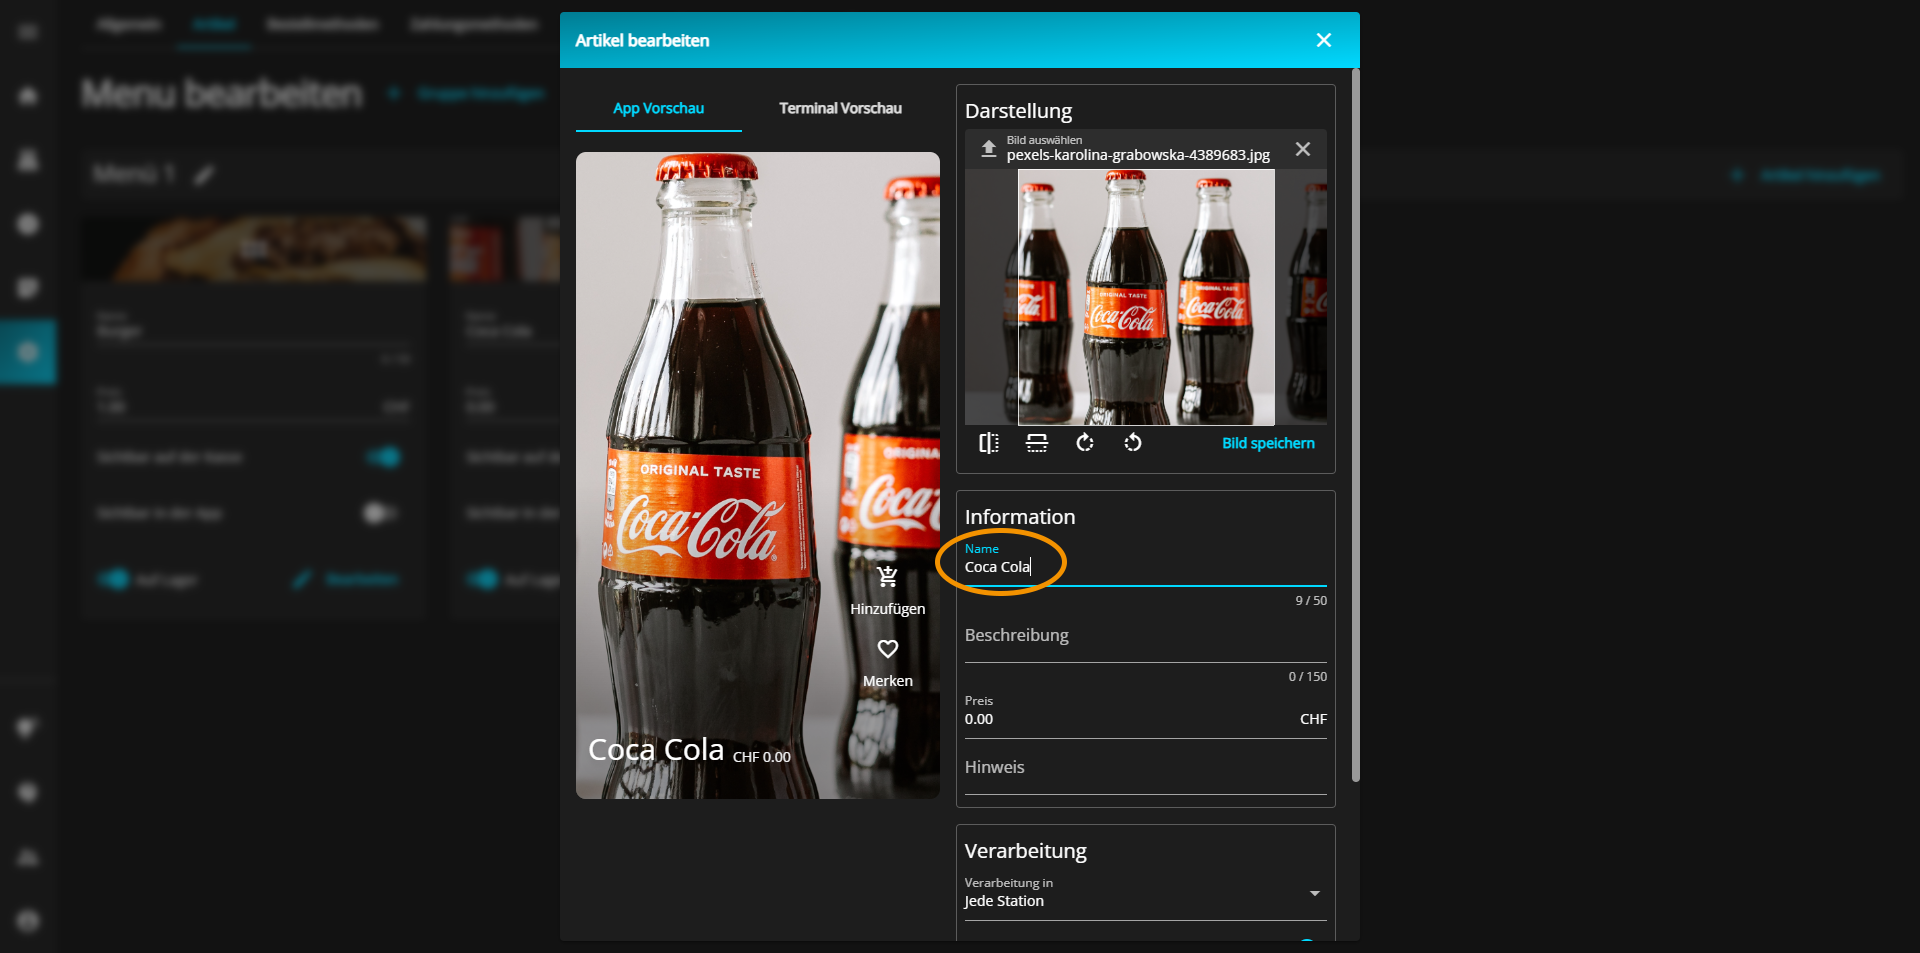
To change the name of your product, click in the "Name" text field and enter the desired product name. Next, you can add a more detailed description of your product so that the customer knows better what they are ordering.
To do this, click in the "Description" text field and describe the product.

Under the "Description" text field, you can specify the price of the product by clicking in the "Price" text field and then entering the desired value.
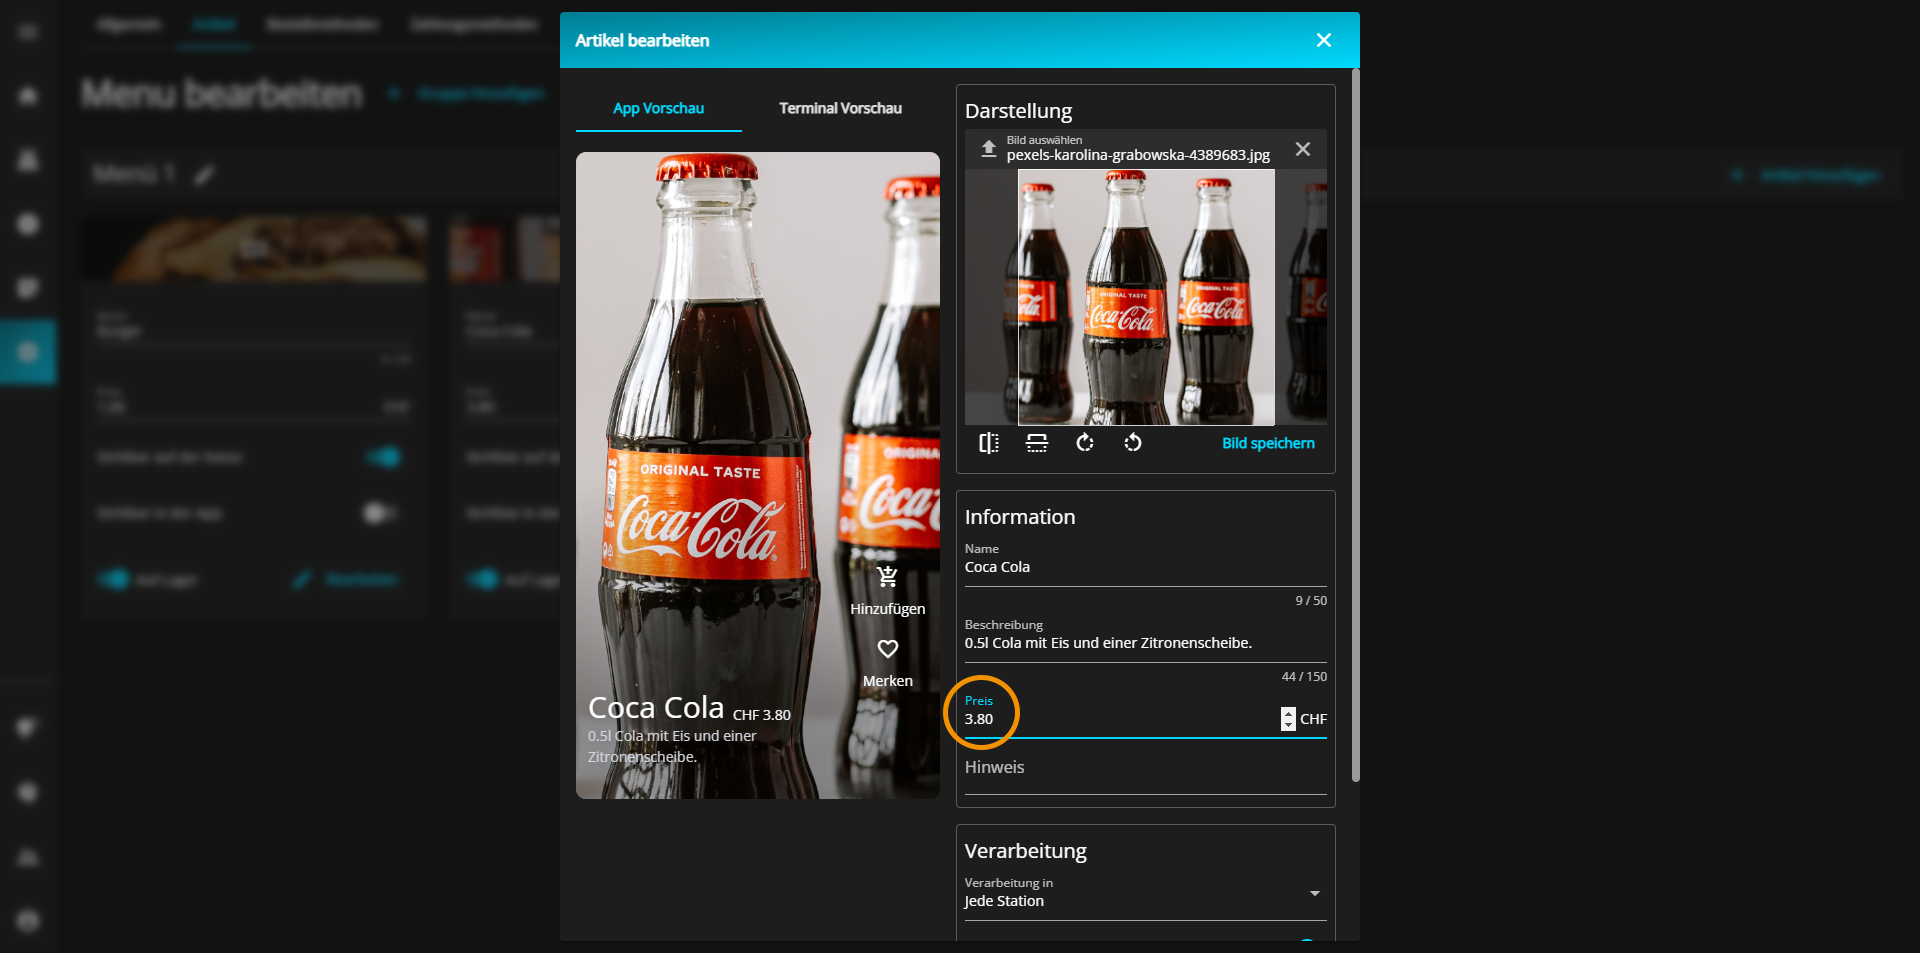
Underneath you have the option of indicating special things, such as whether something is vegetarian/vegan, or information about the origin of the product.

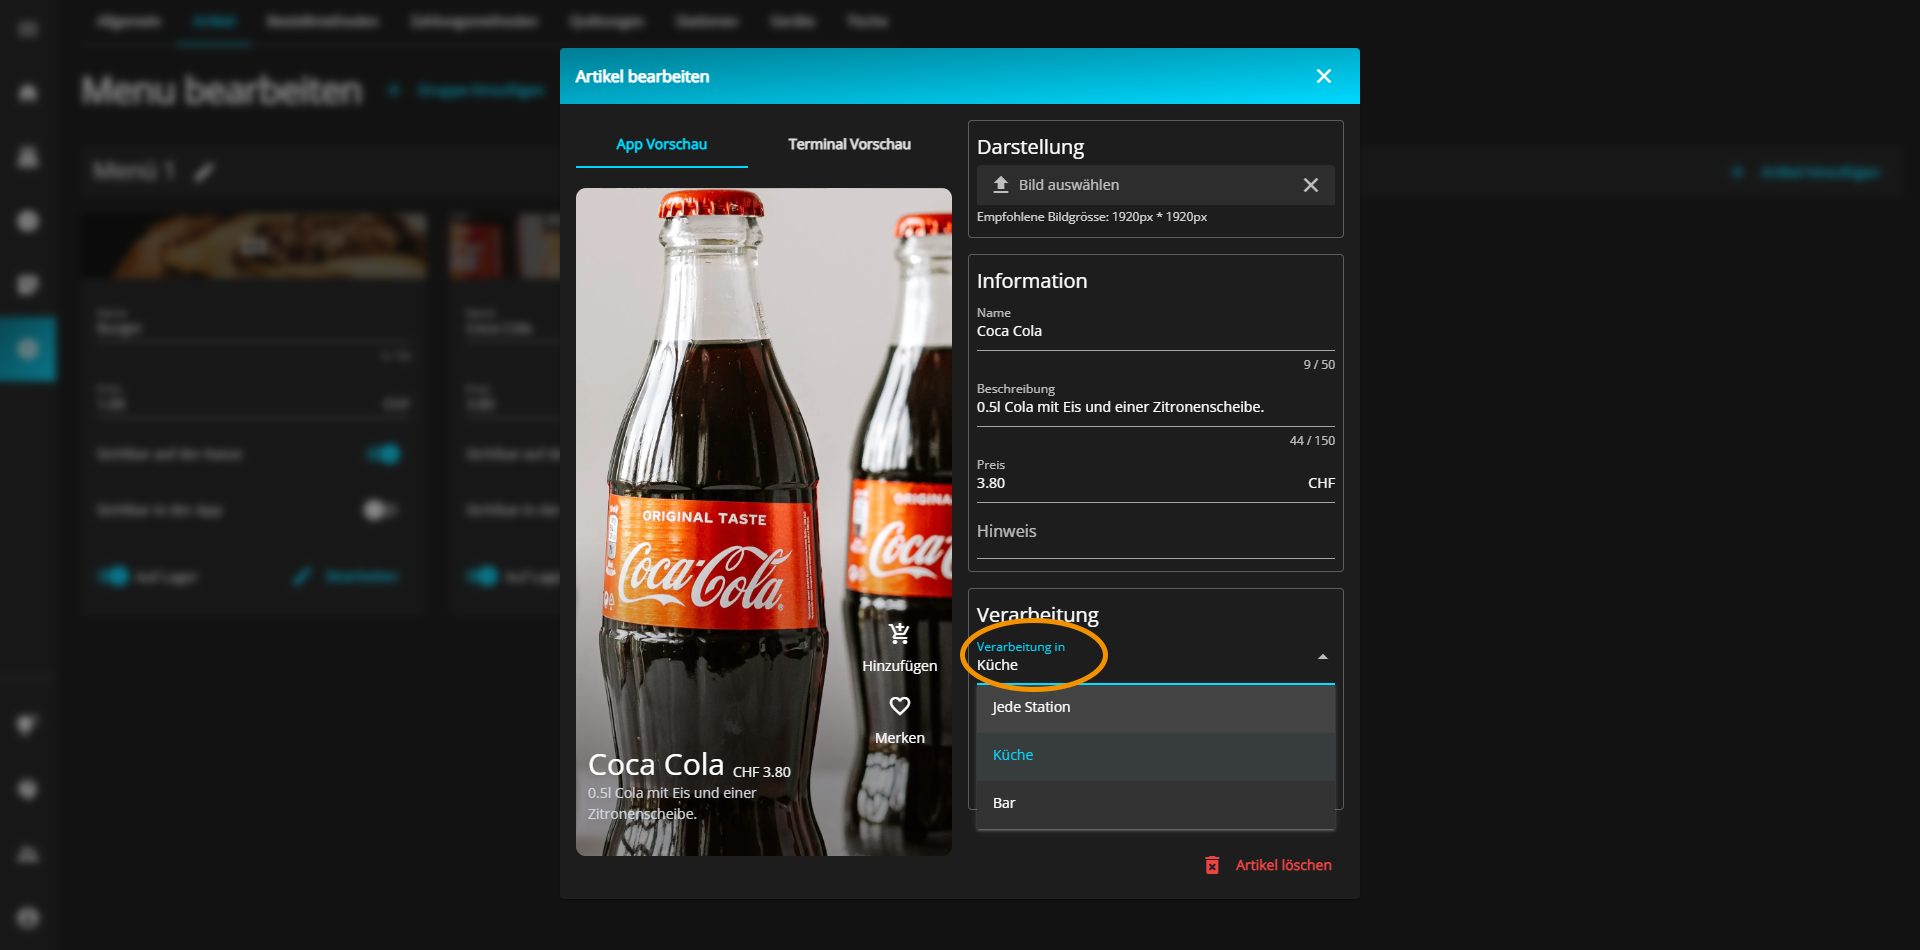
You can also decide in which station the product will be processed.
To do this, click on the "Processing in" drop-down menu and select the processing location.
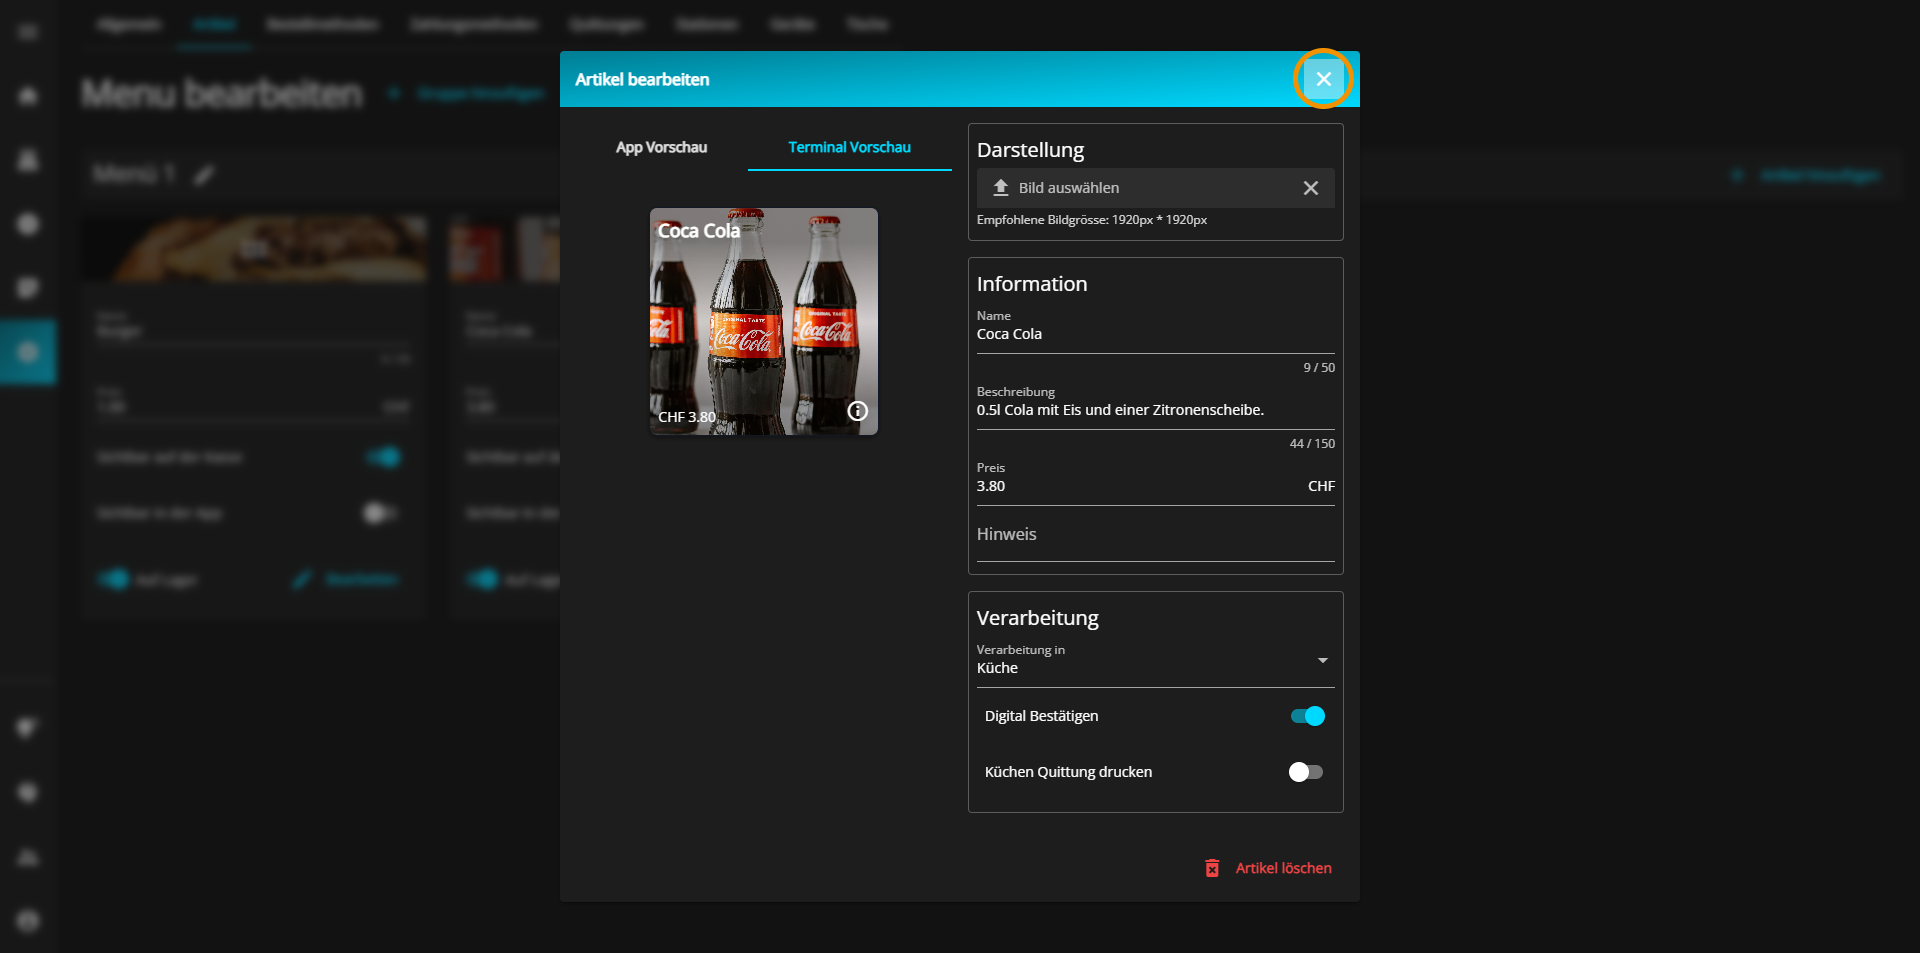
Finally, you have the option of confirming the order digitally and printing a receipt.
You can activate (blue) or deactivate (gray) these two options as you wish by clicking on the respective button.

If you want to see what the finished product looks like in the app, click on "Preview app" at the top left above the small preview image.
The progress of your editing is automatically saved after each step.
When you are satisfied with your entries, click on the X at the top right of the window to close it.